
Look, I’ll be honest with you; I used to be that person who’d go absolutely wild at craft stores during the holidays, loading up my cart with glittery everything, plastic decorations, and enough single-use supplies to make Mother Earth weep. Then about three years ago, I spent an entire Saturday cleaning out my craft room (you know, the annual “I swear I’ll get organized this time” ritual), and I was absolutely horrified by the amount of waste I’d accumulated. Bags of crushed tissue paper, broken plastic ornaments, and enough foam shapes to build a small house.
That was my wake-up call. I grew up watching my grandmother turn feed sacks into quilts and my mom transform thrift store finds into something beautiful; Somehow I’d lost sight of that resourcefulness. So I made a commitment: holidays could still be magical and crafty without trashing the planet. Three years in, I’m proud to say my holiday crafting has completely transformed, and honestly? My decorations look better than ever. Plus, Pepper approves because I’m not constantly shooing him away from toxic glue fumes.
Whether you’re celebrating Christmas, Easter, Thanksgiving, or any holiday in between, I’ve rounded up my favorite eco-friendly crafting ideas that are genuinely beautiful, won’t cost you a fortune, and actually feel good to make. Trust me, sustainable doesn’t mean boring.
Why Sustainable Holiday Crafting Matters (And It’s Easier Than You Think)
Here’s the thing about traditional holiday crafts—they’re often designed for one season of use, then they end up in a landfill. All that glitter? Microplastics. Those foam wreaths? Not biodegradable. The mountains of wrapping paper? Often not recyclable because of the coatings and dyes.
But sustainable holiday crafts flip that script entirely. We’re talking about using natural materials, upcycling what you already have, and creating decorations that can either biodegrade at the end of their life or be treasured year after year. In my experience, these projects actually end up meaning more because there’s intention behind them.
And before you worry that eco-friendly means spending hours foraging in the woods or growing your own hemp (though hey, no judgment if that’s your thing), let me reassure you: most of my sustainable crafts use stuff I already have at home, things from the thrift store, or inexpensive natural materials. I’ve found that my holiday crafting budget has actually decreased since making this shift. Who knew being kind to the planet could also be kind to your wallet?
Natural Christmas Decorations That Smell Like the Holidays
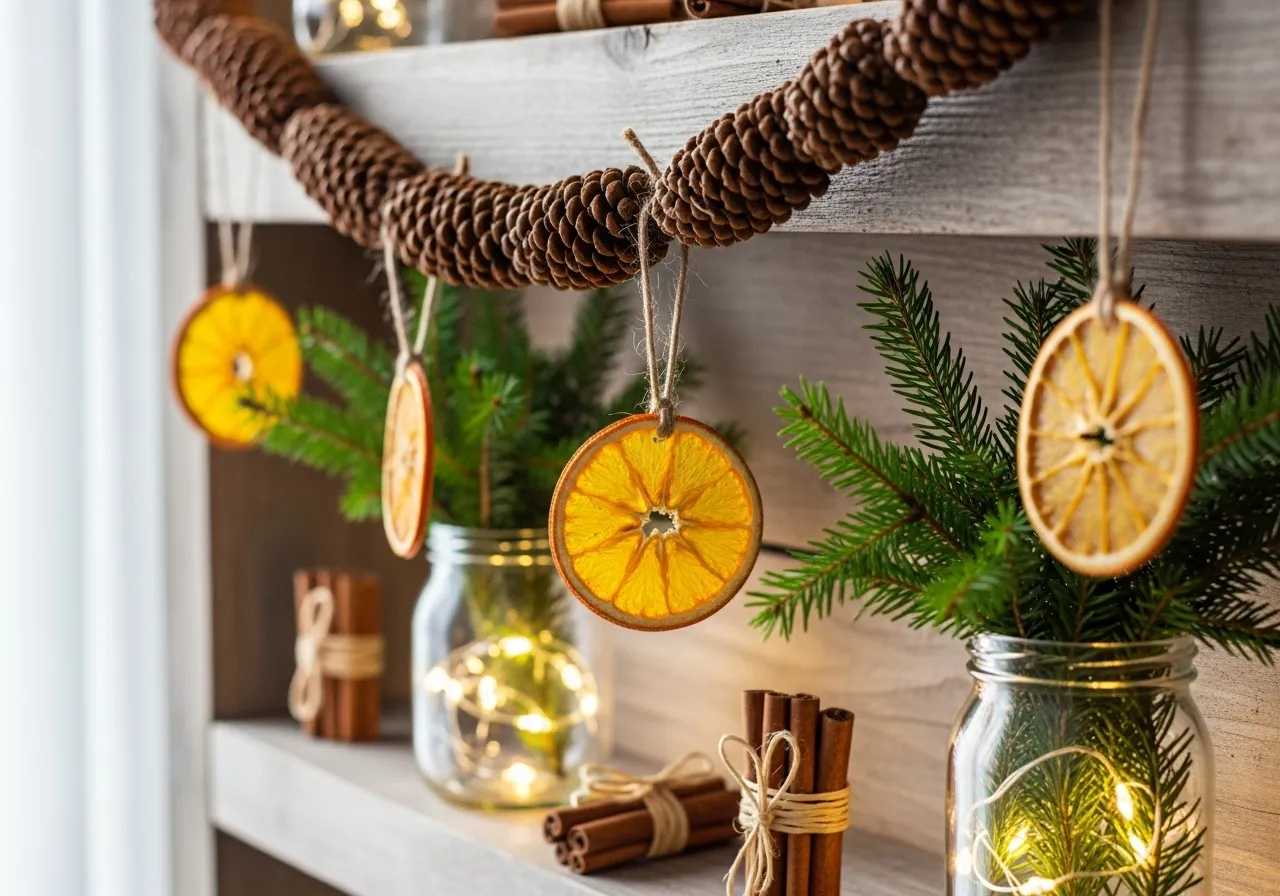
Christmas is probably where I’ve made the biggest sustainable swap, and it starts with bringing the outdoors in—literally. Pinecones, evergreen branches, cinnamon sticks, dried orange slices, and cranberries aren’t just biodegradable; they make your whole house smell incredible.
Last December, I created an entire mantel display using only foraged materials from my neighborhood walks and a few items from the grocery store. I collected pinecones (free!), clipped a few sprigs from the evergreen trees in my yard, and dried orange slices in my oven at 200°F for about three hours. I strung them together with natural twine to make garlands, filled glass jars with pinecones and battery-powered fairy lights (which I reuse every year), and tucked cinnamon sticks into everything.

The best part? When January rolled around, I composted the orange slices and greenery, saved the pinecones for fire starters, and the whole thing cost me maybe fifteen dollars. Compare that to the plastic pre-lit garland I used to buy every year that would inevitably break by Boxing Day.
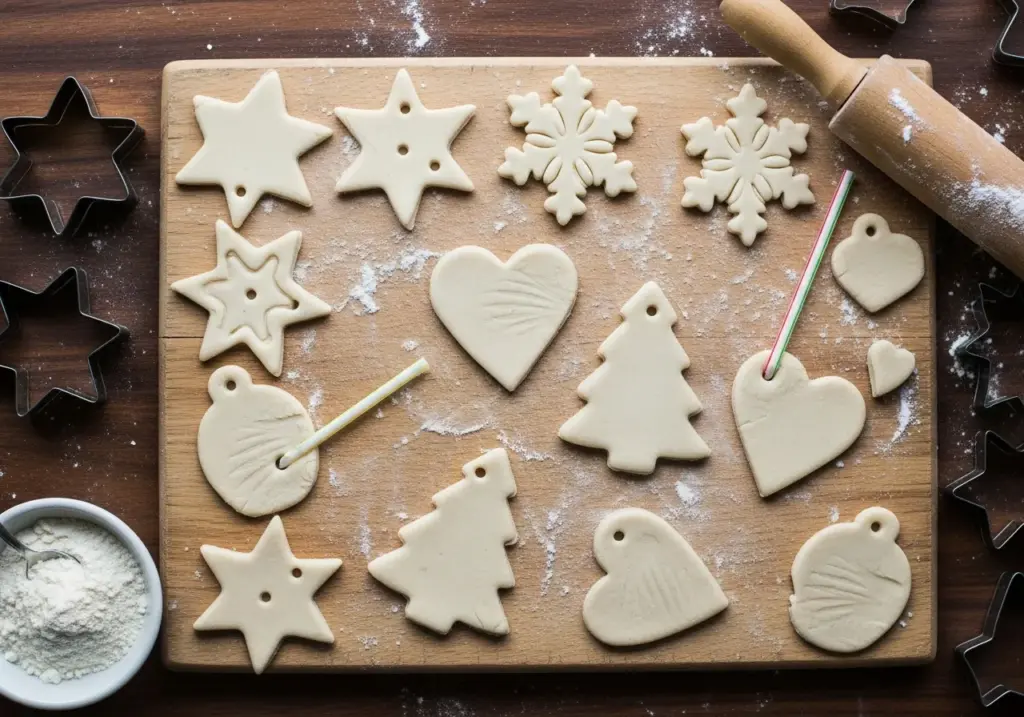
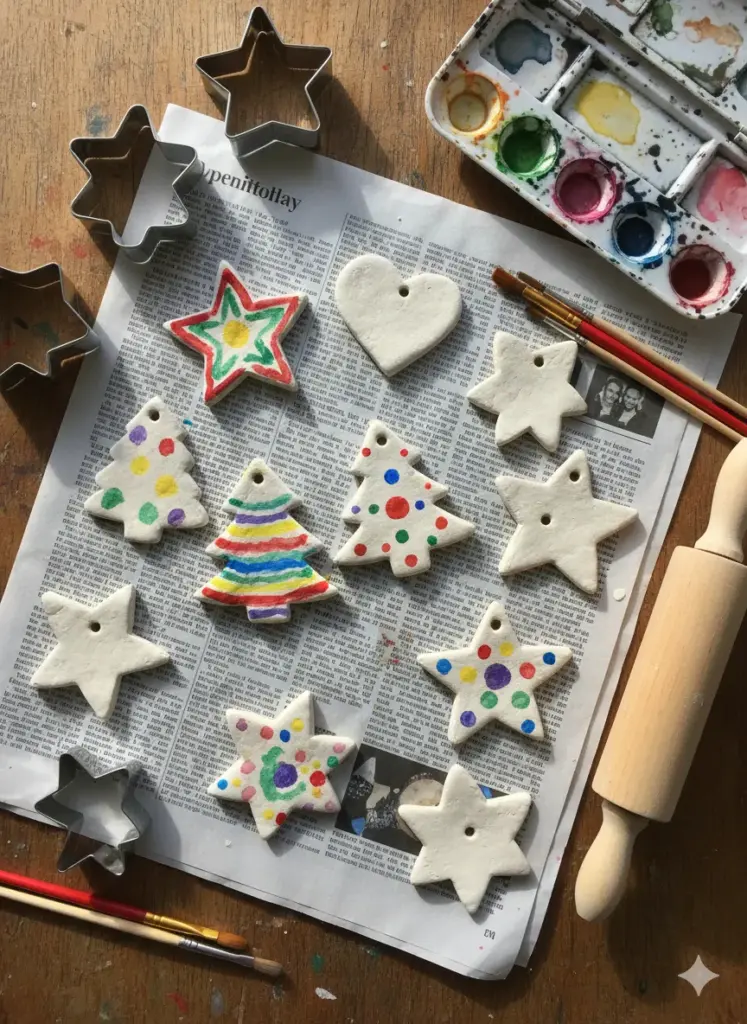
For ornaments, I’ve become obsessed with salt dough. It’s just flour, salt, and water—things you definitely have in your pantry right now. You can cut them into any shape, bake them until hard, and either leave them natural or paint them with non-toxic watercolors. My nieces came over last year and we made dozens of them. Sure, some looked more like abstract art than snowflakes, but they’re hanging on my tree right now and they make me smile every single time.
Easter Crafts Using Natural Dyes and Repurposed Materials
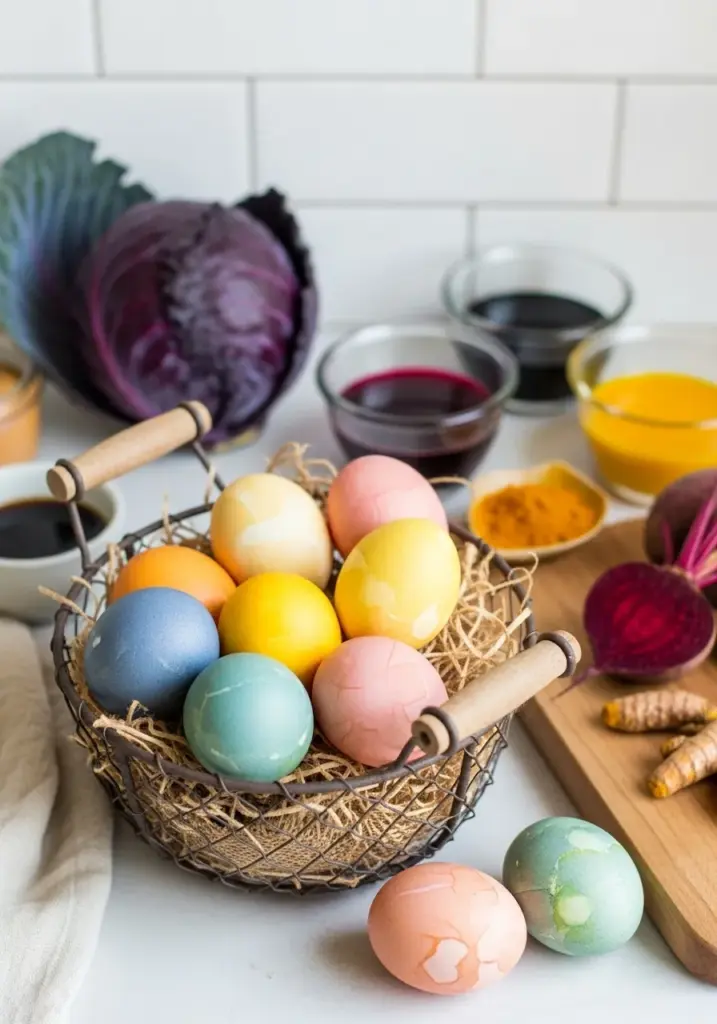
Easter was actually where my sustainable crafting journey started getting really fun. Traditional Easter egg dyes always stressed me out with their artificial colors and plastic packaging. Then I discovered natural dyeing, and y’all, it’s like a science experiment that actually works.
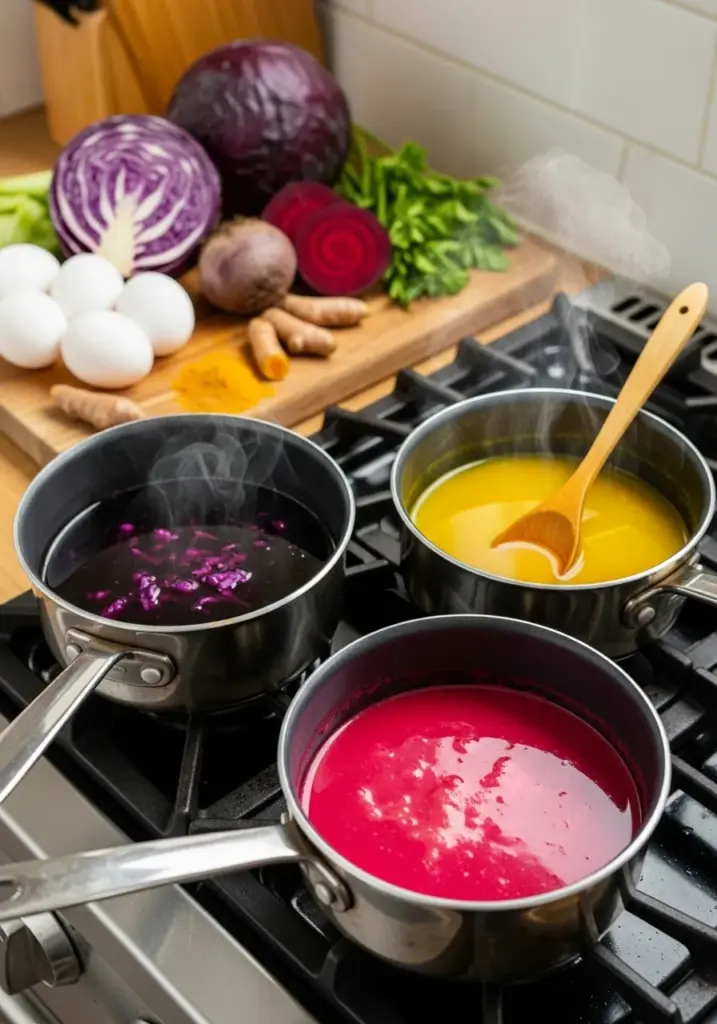
Red cabbage makes the most gorgeous blue eggs. Turmeric gives you sunny yellow. Beet juice creates beautiful pink tones. Coffee and tea produce lovely browns and tans. I’ve found that the colors are softer and more sophisticated than the neon stuff from the store—they look like they belong in a fancy farmhouse catalog.
Here’s my foolproof method: boil your natural ingredient (say, two cups of chopped red cabbage) in water for about 15-20 minutes. Let it cool, add a tablespoon of white vinegar, and submerge your hard-boiled eggs for at least 30 minutes—longer for deeper colors. The whites from the eggs can go into egg salad, and the shells eventually go into my compost bin. Zero waste, maximum beauty.
For Easter baskets, I stopped buying those plastic grass shreds years ago. Instead, I shred brown paper bags or use tissue paper I’ve saved from gifts throughout the year. If you’re feeling fancy, you can even use dried grass clippings from your yard or shredded newspaper (the black and white sections work best—avoid the glossy colored ads).
One trick I learned the hard way: natural dyes work best on white or brown eggs. I once tried dyeing greenish eggs from my neighbor’s chickens and ended up with some truly bizarre colors. Live and learn, right?
Upcycled Thanksgiving Centerpieces and Decorations
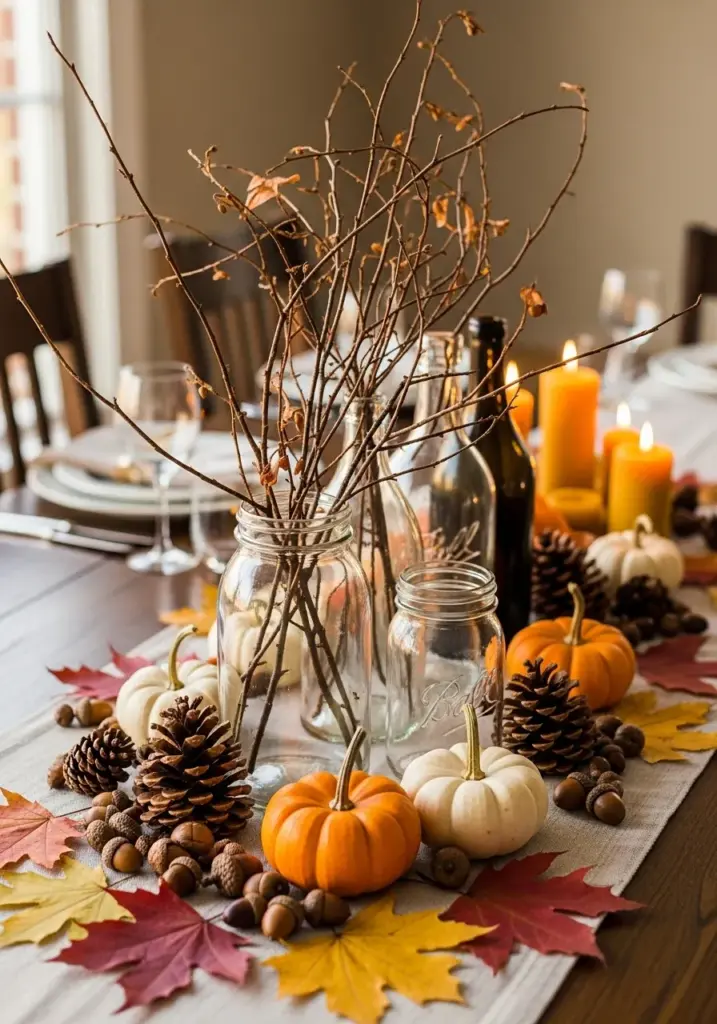
Thanksgiving doesn’t get enough crafting love, honestly. It’s sandwiched between Halloween and Christmas, so it often gets overlooked. But I’ve found some of my favorite sustainable projects come from autumn’s natural abundance.
My go-to Thanksgiving centerpiece is ridiculously simple: I collect interesting branches from my yard (look for ones with cool shapes or remaining leaves), spray the cut ends with a bit of water, and arrange them in vintage bottles or mason jars I’ve picked up at thrift stores. Between the branches, I tuck in whatever I can find—mini pumpkins from the farmers market, pinecones, acorns, or even just colorful leaves pressed between book pages to flatten them.
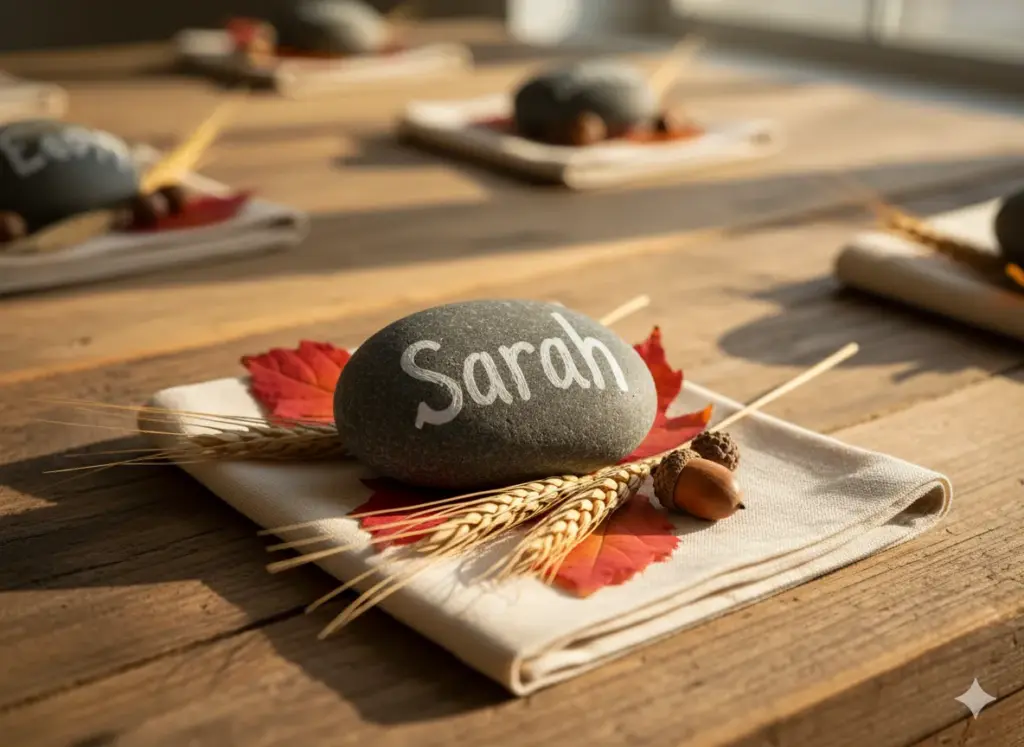
Last Thanksgiving, I created placeholders using smooth river rocks I’d collected during a summer camping trip. I painted each guest’s name on a rock with white acrylic paint (the washable kind so I could reuse the rocks later), and people loved them so much they took them home. Several friends texted me later saying they’d used their rock as a paperweight or garden marker.
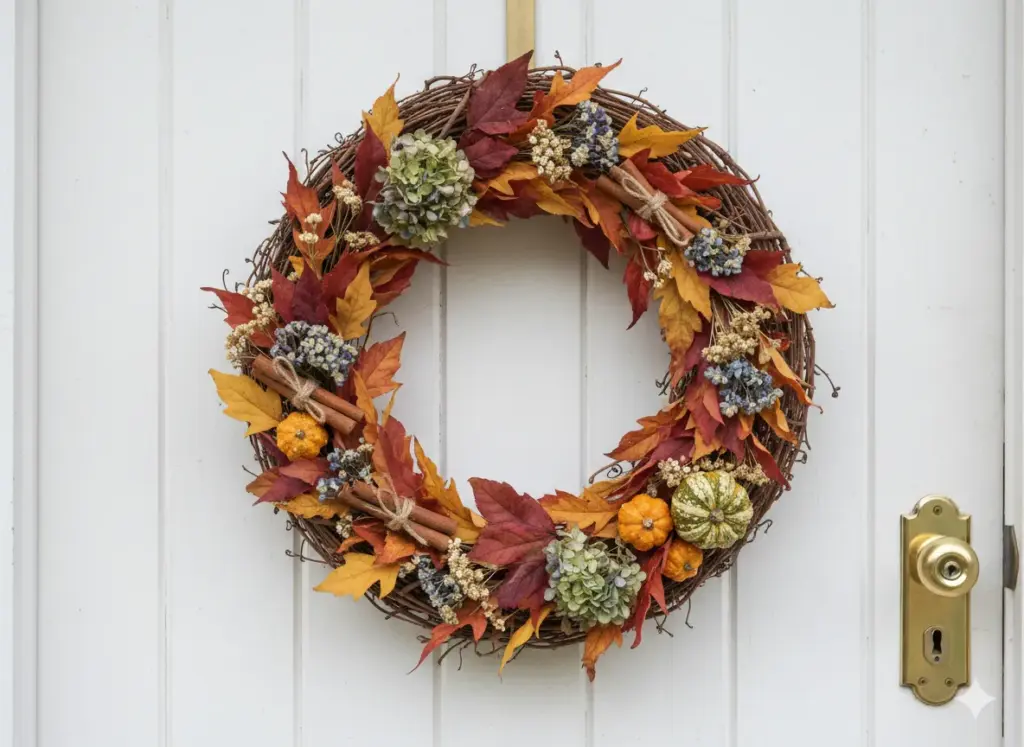
For wreaths, I’ve completely abandoned those foam bases. Instead, I make grapevine wreaths from scratch—which sounds intimidating but is actually pretty forgiving. You can usually find grapevines at craft stores, or if you’re lucky enough to know someone with grape plants, they’re often happy to give you trimmings. You just wrap and weave the vines into a circle, tucking the ends in as you go. Then I hot glue (with a low-temp glue gun to avoid burns—learned that lesson) whatever natural elements I have: preserved fall leaves, dried flowers, cinnamon sticks, or small gourds.
The beauty of natural materials is that they age gracefully. My grapevine wreaths from previous years have dried and darkened, but they’ve taken on this beautiful rustic patina that I couldn’t replicate if I tried.
Fabric Scrap Holiday Projects for Every Celebration
Okay, confession time: I have a massive bin of fabric scraps in my craft room. Like, embarrassingly large. I used to feel guilty about it until I realized it’s actually a treasure trove for sustainable holiday crafts. Old t-shirts, worn-out jeans, outgrown clothes from my nieces, thrift store finds that were too damaged to wear—all of it gets a second life.
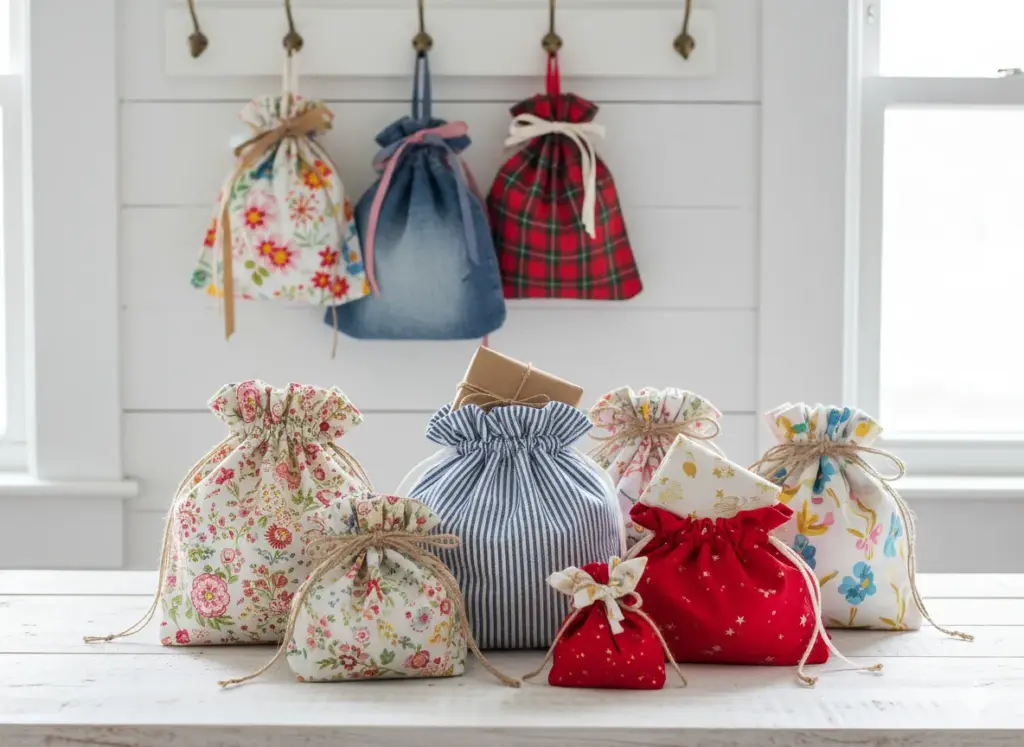
For Christmas, I’ve made reusable fabric gift bags in every size imaginable. They take maybe ten minutes each if you have basic sewing skills (or even if you don’t—fabric glue works in a pinch). I use them instead of wrapping paper, and my family has gotten into the habit of returning them to me after holidays so we can all use them again. Some of these bags have been circulating for three years now. My mom jokes that she recognizes bags by their fabric patterns now—”Oh, this is from Aunt Sarah’s old curtains!”
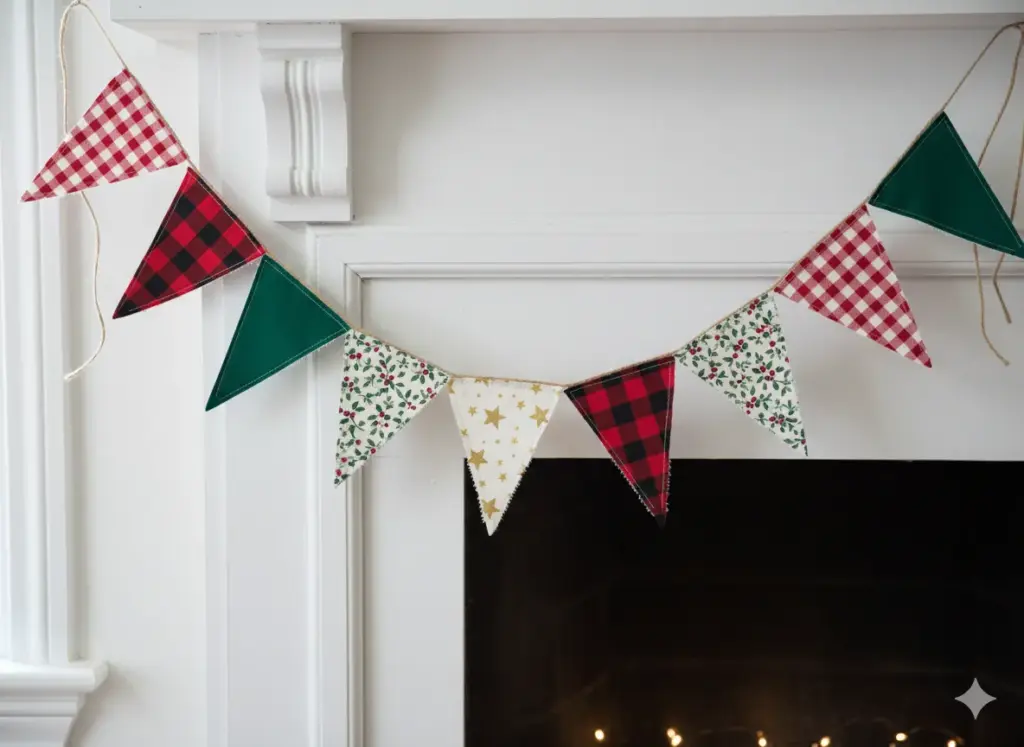
Fabric scraps also make beautiful bunting and garlands for any holiday. I cut triangles (they don’t have to be perfect—wonky adds character), fold the top edge over a length of twine or ribbon, and either sew or glue them in place. For Valentine’s Day, I use reds and pinks. For Easter, pastels. For Fourth of July, anything with stars and stripes. The same basic technique works for every holiday, and nothing goes to waste.
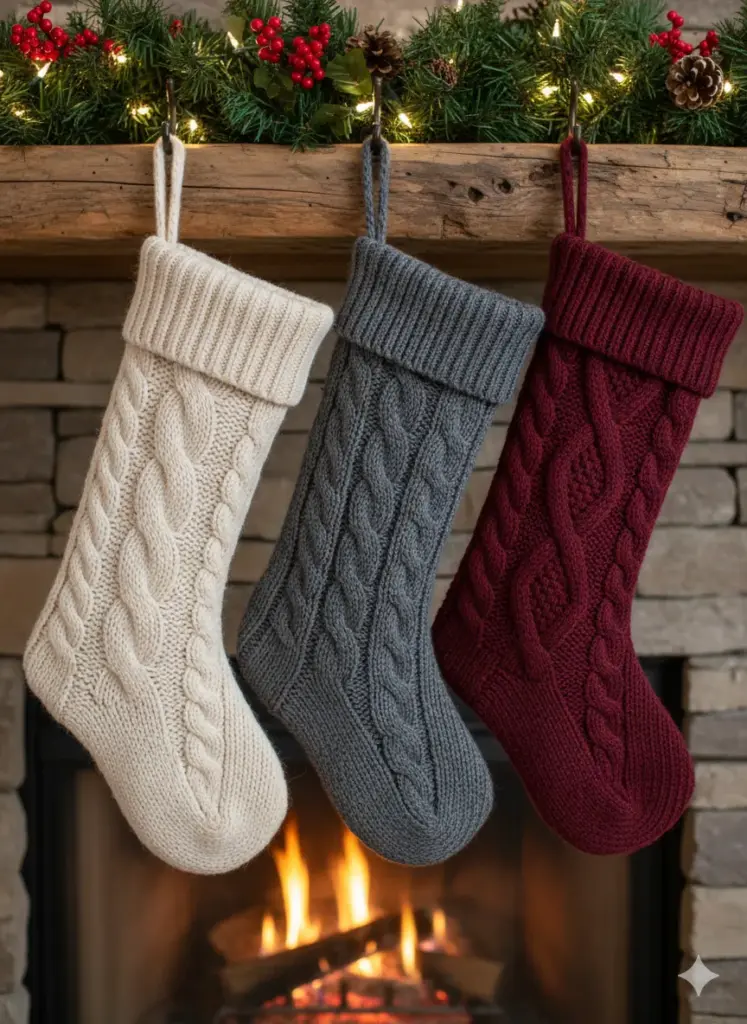
One of my favorite discoveries has been using old sweaters for holiday stockings. That cashmere blend sweater with the moth holes? Perfect for a cozy Christmas stocking. I cut out a stocking shape (there are free templates everywhere online—just search “stocking template printable”), sew around the edges, and add a fabric loop at the top for hanging. The best part is that sweater fabric doesn’t fray, so you don’t need to hem anything. Sometimes I add embroidery or appliqué details using more fabric scraps, but honestly, they’re beautiful just as they are.
Beeswax and Soy Candles for Holiday Ambiance
Nothing says holidays like candlelight, but traditional paraffin candles? Not great. They’re petroleum-based and can release not-so-great stuff when they burn. I switched to making my own beeswax and soy candles a couple years ago, and I’ll never go back.
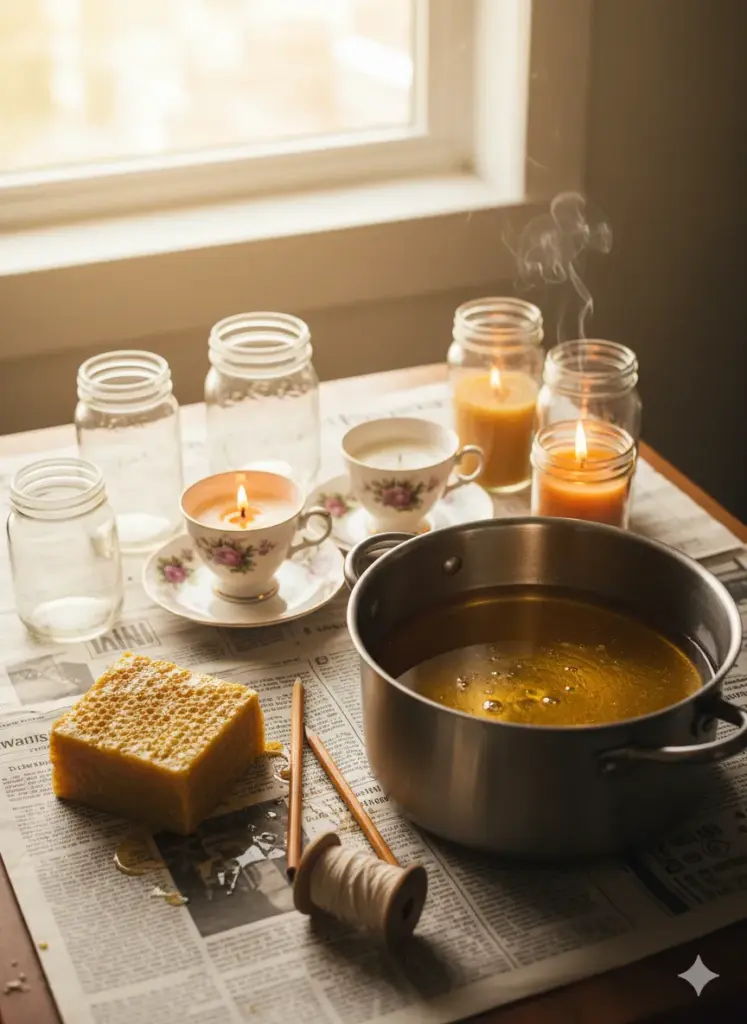
Beeswax candles smell naturally sweet and clean without any added fragrance. I buy beeswax in bulk (it lasts forever), melt it in a double boiler (or a jar set in a pot of simmering water—way easier to clean), and pour it into containers I’ve saved throughout the year. Old jelly jars, vintage teacups from thrift stores, even cleaned-out coconut shells make gorgeous candle vessels.
For wicks, I use cotton string—just make sure it’s 100% cotton, not a blend. I tie one end to a pencil laid across the top of the container and let the other end dangle to the bottom. Pour the melted wax carefully, let it cool completely (this takes patience, which I’m terrible at), and trim the wick to about a quarter inch. Done.
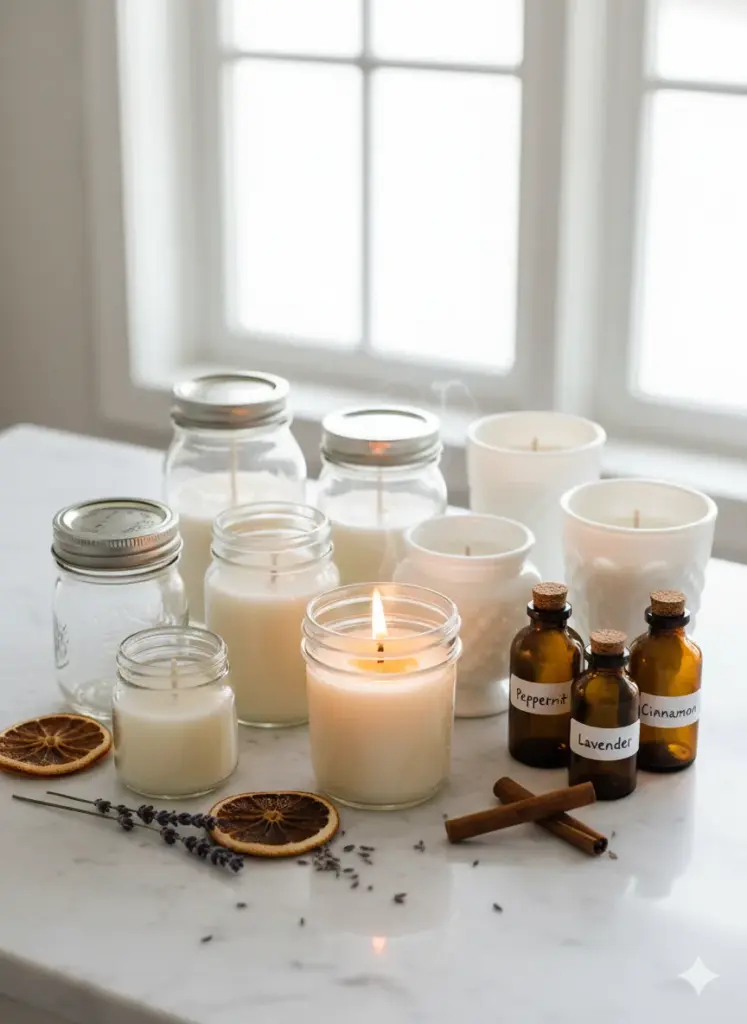
Soy candles work similarly but take scent better if you want to add essential oils. I make peppermint candles for Christmas (about 20-30 drops of essential oil per cup of melted wax), lavender for Easter, and pumpkin spice for Thanksgiving. The key is adding the essential oils after the wax has melted and cooled slightly—if it’s too hot, the scent evaporates.
Here’s what I’ve learned: beeswax is more finicky about wicking than soy. If your wick is too thin, the candle will tunnel and waste wax. Too thick, and the flame gets huge and smoky. It took me a few batches to figure out the right size, but now I buy pre-tabbed cotton wicks in the size that works for my typical container width, and it’s foolproof.
Kid-Friendly Eco Holiday Crafts That Don’t Create Chaos
Speaking of my nieces, I’ve learned that sustainable crafting with kids is totally doable—you just need projects that are forgiving and not too precious. Kids don’t care if something is Pinterest-perfect; they want to make something fun.
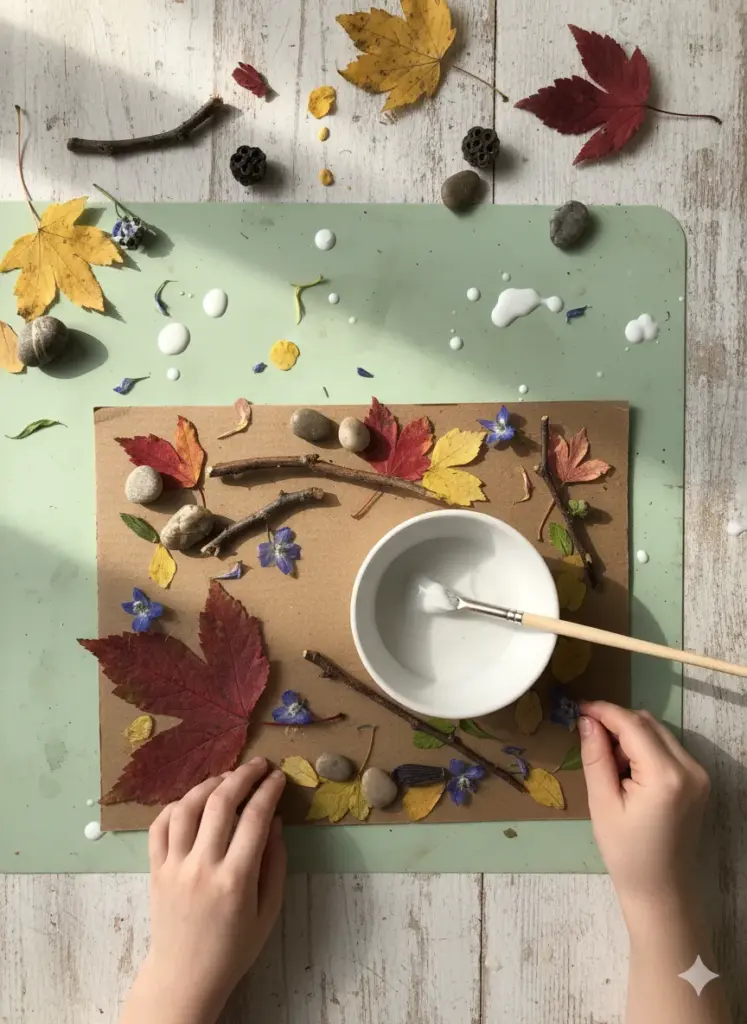
Nature collages are my secret weapon. I send the kids outside with a bag (we use reusable grocery bags) and tell them to collect whatever they find interesting: leaves, small sticks, flower petals, interesting rocks, seed pods. Then we arrange them on cardboard (I save every box that comes to my house) and glue them down with regular white school glue or flour paste (just mix flour and water until it’s thick like glue—totally non-toxic).
For Christmas, we’ve made ornaments using air-dry clay, which you can make at home with baking soda, cornstarch, and water. The kids roll it out, cut shapes with cookie cutters, and poke a hole at the top with a straw before it dries. After they’re dry (takes a day or two), the kids paint them with watercolors. Sure, some of them look… abstract. But they’re made with love and entirely biodegradable materials.
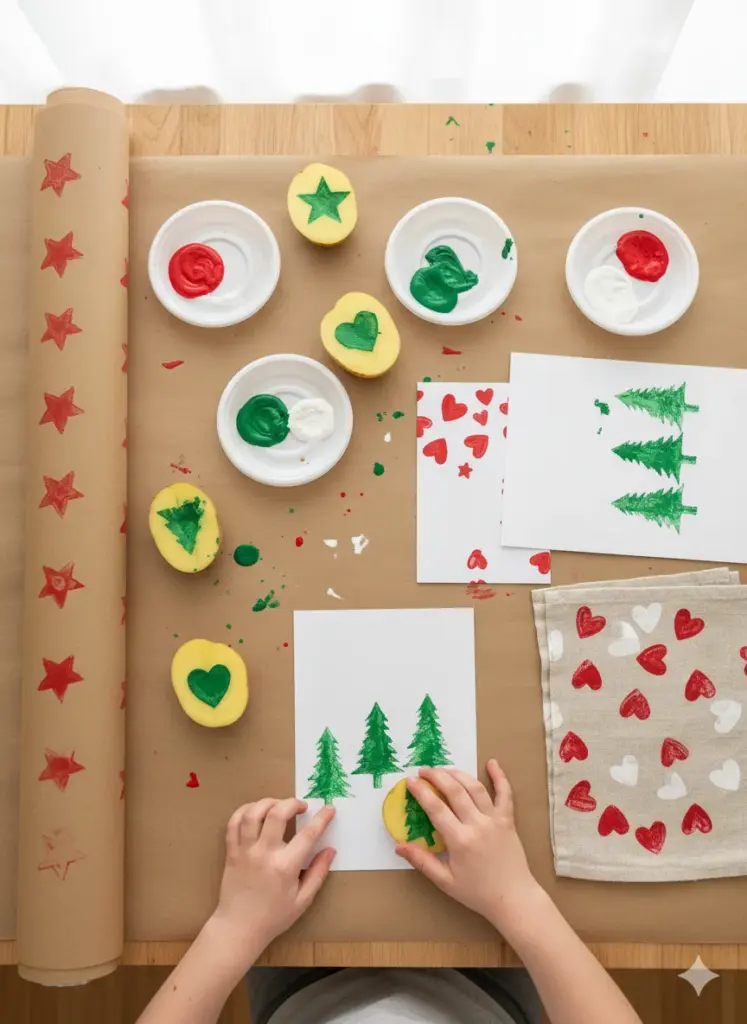
Potato stamps are another winner for any holiday. Cut a potato in half, carve a simple shape into the flat side (stars, hearts, trees—keep it simple or you’ll be there forever), and let kids stamp onto fabric or paper with non-toxic paints. We’ve made holiday cards, wrapping paper, and even table runners this way. The potatoes compost when you’re done, and kids think it’s hilarious to craft with vegetables.
One important note: I always set up crafts with clean-up in mind. Newspaper or old sheets as table covers, wet washcloths within reach, and smocks (or just old t-shirts worn backward). Nothing kills your enthusiasm for sustainable crafting like spending an hour scrubbing paint off your dining room table—trust me on this one.
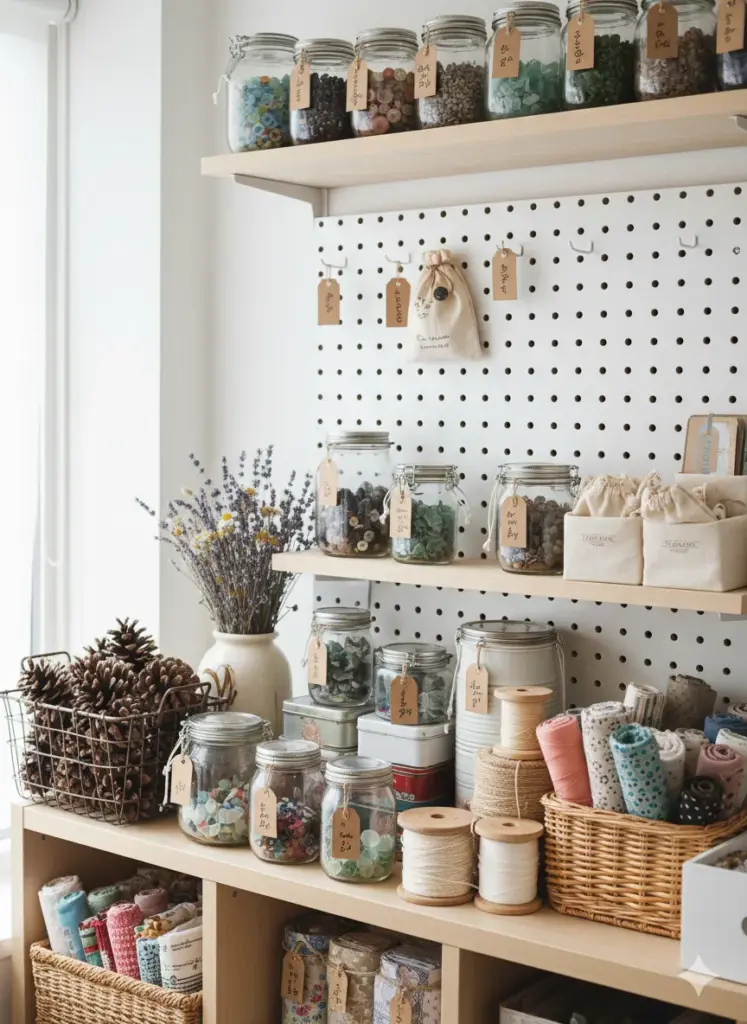
Where to Source Sustainable Crafting Materials Without Spending a Fortune
Let’s talk practically for a minute about where to actually get this stuff. Because sustainable crafting only works if you can actually access the materials without driving a hundred miles or spending your entire paycheck.
Nature is free, obviously. My regular walking route with Pepper has become a foraging mission. I look for pinecones, interesting branches, acorns, colorful leaves in autumn, and flowering weeds (yes, weeds can be beautiful) in spring. I keep a small cloth bag with me on walks now. The key is only taking what you need and never stripping all of something from one area—leave plenty for wildlife and other people.
Thrift stores are absolute goldmines for sustainable crafters. I’ve found vintage fabric, old sweaters, glass jars, ceramic containers, picture frames (I remove the glass and use the frames for everything), baskets, and so much more. My local Goodwill knows me by name at this point. Shopping secondhand keeps these items out of landfills and costs a fraction of buying new.
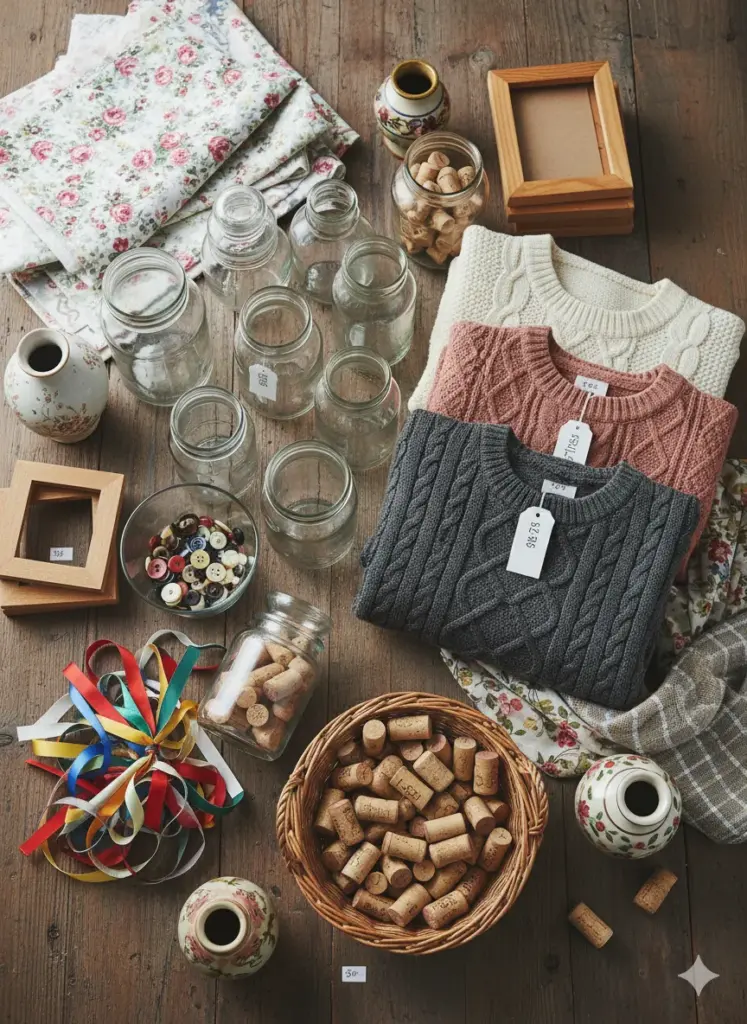
Your own home is probably full of materials you don’t even realize are useful. Cardboard boxes, old magazines, fabric scraps, buttons from clothes you’re about to donate, wine corks, glass bottles, paper bags, ribbons from gifts—I keep a designated bin for “potential craft supplies” and toss things in there instead of the trash. When I need something for a project, I shop my own bin first.
Online marketplace groups and Buy Nothing communities are incredible for craft supplies. I’ve gotten entire boxes of craft supplies from people who were decluttering—ribbons, yarn, fabric, you name it. And when I have excess supplies, I pass them along to others. It’s this beautiful circular system that keeps stuff in use and out of landfills.
For specific items like beeswax, essential oils, or natural dyes, I buy in bulk when possible. It’s cheaper per unit, and I only need to make one purchase that lasts through multiple holidays. I’ve found that Amazon, even though it’s not always the most sustainable shipping option, sometimes offers the best prices on bulk crafting supplies, especially for natural materials like cotton wicks or soy wax flakes.
Making Your Eco-Friendly Holiday Crafts Last Year After Year
One aspect of sustainable crafting that doesn’t get talked about enough is storage and care. Creating something eco-friendly loses its impact if it falls apart after one use and ends up in the trash anyway.
I’ve learned to be strategic about which projects are meant to be temporary (like natural dyes on eggs that get eaten or orange slice garlands that compost) versus which ones should last for years (like fabric stockings or beeswax candles).
For items meant to last, proper storage matters. I keep my fabric holiday items in breathable cotton bags (made from old pillowcases—see, everything gets reused) rather than plastic bins where they could develop mildew. Beeswax candles I store in a cool, dark place because beeswax can bloom (develop a whitish film) in varying temperatures—it’s harmless and actually kind of pretty, but if it bothers you, a quick buff with a soft cloth removes it.
Natural decorations like grapevine wreaths and pinecone arrangements I store in cardboard boxes in my garage. Yes, they might attract the occasional curious bug, but that’s nature doing its thing. I just give everything a once-over before bringing it back into the house each year.
Some crafts are naturally meant to be refreshed annually, and I’ve made peace with that. My evergreen garlands get composted each January, which means I get to enjoy the fun of making new ones next December. The orange slice ornaments get brittle after a year or two, so they go in the compost and I make fresh ones. This rhythm of creating, using, and returning to the earth feels right—much better than shoving broken plastic decorations into a trash bag.
Honestly, switching to eco-friendly holiday crafts has been one of the best decisions I’ve made for my creative practice. My holidays feel more intentional now, more connected to the seasons and materials around me. And there’s something deeply satisfying about creating beauty that doesn’t come with a side of environmental guilt.
You don’t have to overhaul everything at once—I certainly didn’t. Start with one project, maybe natural dyes for Easter eggs or a fabric gift bag for Christmas. See how it feels. I’m betting you’ll find, like I did, that sustainable crafting isn’t about sacrifice or settling for less. It’s about creating something genuinely meaningful that honors both your creativity and the world around you.
And hey, if you make any of these projects, I’d love to see them! Tag me on social media or drop a comment—I’m always looking for new ideas and inspiration from fellow crafters.
Happy crafting, friends. Let’s make the holidays beautiful and kind to our planet.
